The third diagram is is the combination of both diagrams.

Here's a peek at how mine looks
After marking and seperating all the wires it was time to start soldering.
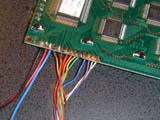
Use a multi meter or a continuity tester to test each solder point. You have
to make sure that your solder didn't run to far, hence causing a short that could cause damage to the lcd or your computer.
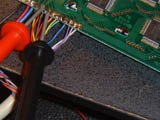
Hold one test post on first solder point and test every other solder point with the other test post.
Then move to the first test post to the the next solder point and continue testing until you have
checked all 16 solder points.
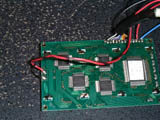
Here is a view of the LED backlight pinouts. You also can see the
piece of heatshrink tubing keeping all the messy wires togther in the top right.
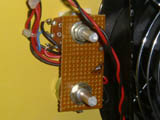
After soldering all the wires, I decided I didn't like the idea of the 2 Potentiometers just hanging
around the inside of my case. So I mounted them on a small board and used double sided tape to attach it to the inside of the case.


All Rights Reserved. 2001 Design by
Disco.

 Who's online?


 News Submission
)
)
)
)
)